A Brief History of Chicken & Rice
Baked chicken and rice has ancient roots, with origins that can be traced back to early civilizations in Asia and the Middle East, where rice was a dietary staple and chicken was one of the first domesticated animals. Iconic dishes like Hainanese Chicken Rice from China and Maqluba from the Middle East showcase the early combination of poultry and grains, often infused with fragrant spices and cooked together to enhance flavor.
As rice cultivation spread through trade routes, new variations were developed around the world. In the Americas, chicken and rice evolved into creamy baked casseroles influenced by African and European settlers. Today, baked chicken and rice remains a staple for its convenience and ability to fuse tradition with modern cooking. Its enduring popularity is a testament to how simple, accessible ingredients can create comforting, nutritious meals.
What Makes Our Baked Chicken & Rice “Elevated”?
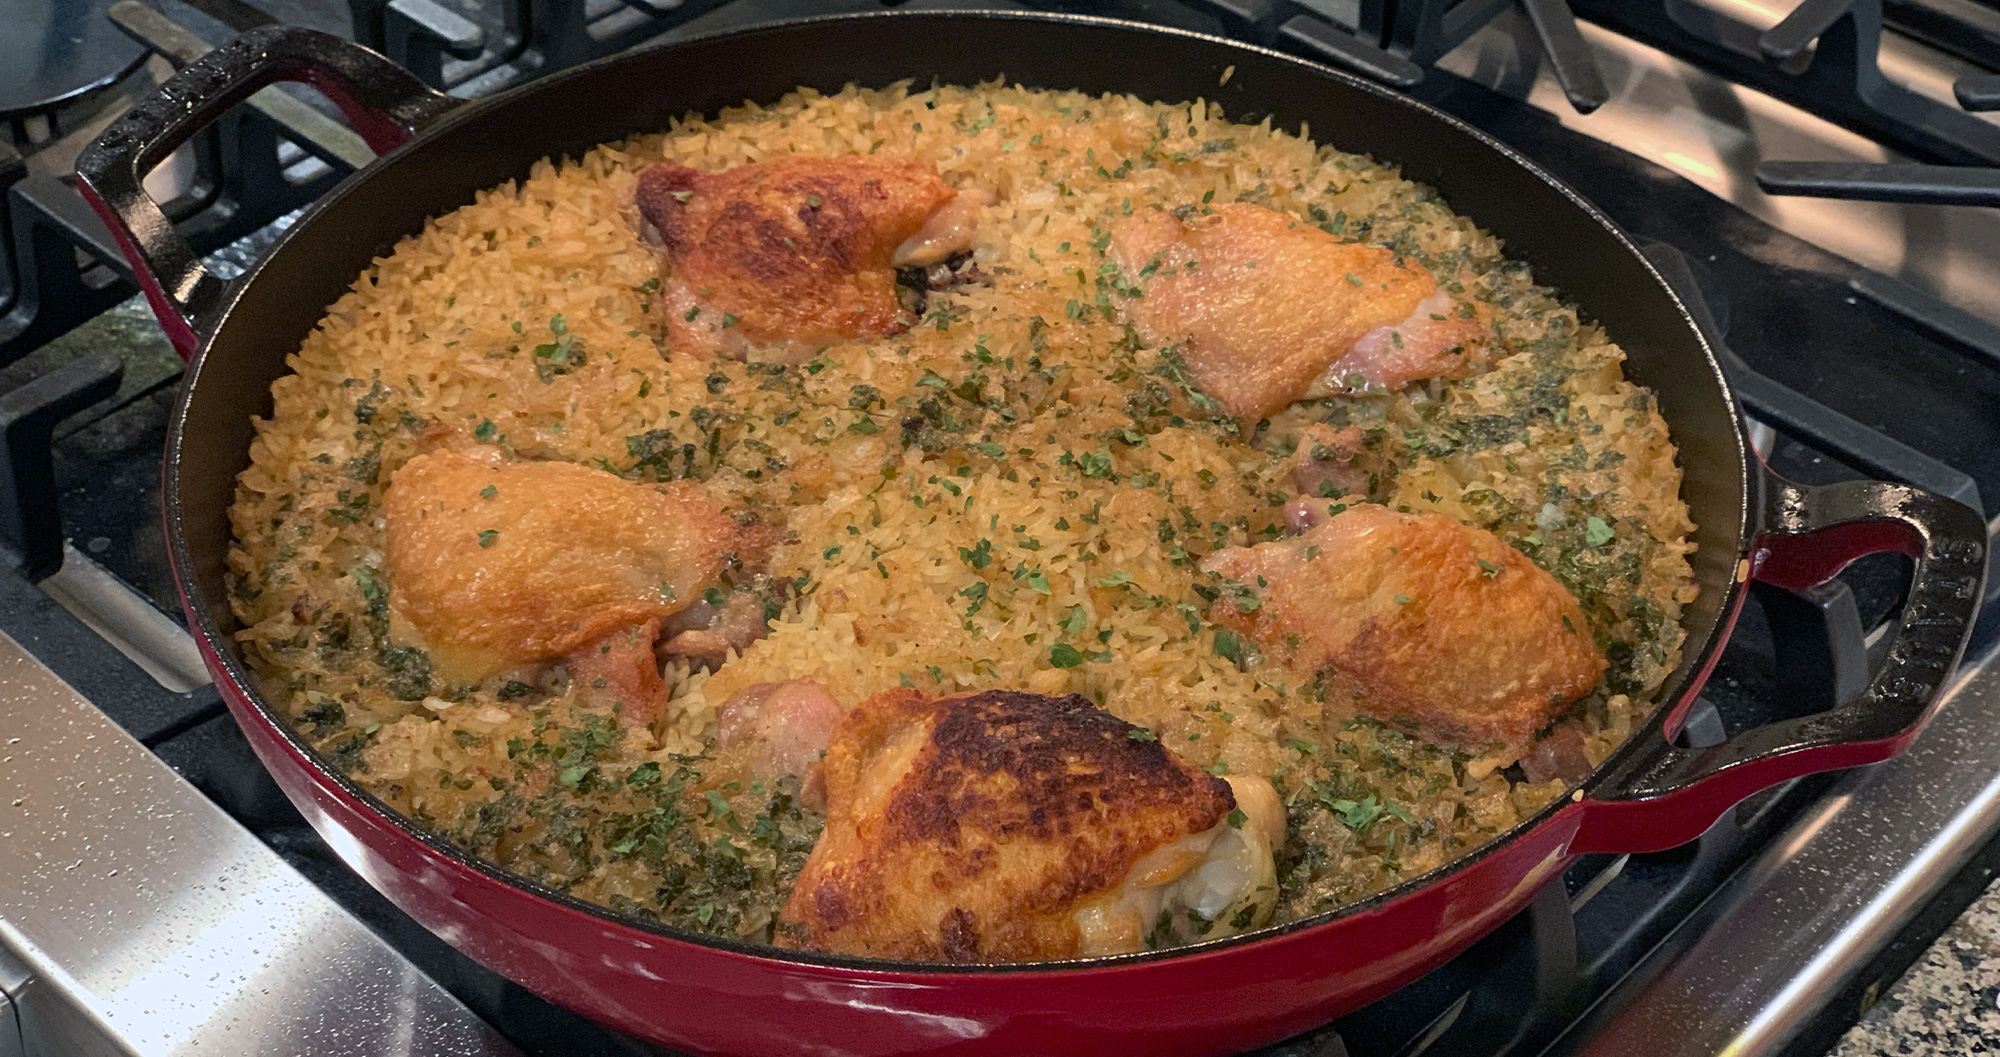
The secret lies in the layers of flavor, and it's the techniques that will set this dish apart from what you may remember your mom cooking up back in the day. We start with a quickly searing the chicken in ghee—adding richness and a nutty undertone, while also locking-in the juices and beginning the foundation of an ultra-crispy skin. Later on, a white wine or vermouth reduction adds depth and umami that isn’t typically found in a classic chicken & rice dish. Oh, and it doesn’t take hours to finish.
Why a Wine Reduction is Important
Although it’s not a common addition to chicken & rice recipes, a wine reduction is the secret weapon for elevating this dish (and countless others!). It concentrates the rich, complex flavors of the wine while simmering away excess liquid, leaving you with a flavor base that’s vibrant and full of depth.
How to Master a White/Red Wine Reduction—Detailed Steps
Beyond chicken & rice, a wine reduction can turn any simple meal into something truly special—it’s the secret weapon for elevating practically any dish. Whether you’re using it as a flavor-booster—like in our baked chicken & rice recipe—or using it to create a beautiful, velvety, and vibrant pan sauce, a wine reduction can turn a simple meal into something truly special. Here’s how to master it step-by-step.
- Select a wine that complements your dish.
- Dry red wines like cabernet sauvignon, merlot, or syrah are best for hearty, meaty dishes like a chili or beef steak.
- Sweet red wines like port or lambrusco work well to balance rich meats, such as pork belly or beef short rib.
- Dry white wines like sauvignon blanc, pinot grigio, or chardonnay are ideal for lighter proteins (chicken, turkey) or seafood.
- Sweet white wines like riesling or moscato are perfect when you’re looking to enhance lighter proteins with a sauce that has a slightly sweet, fruity note.
- Mise en place.
Gather and prepare ingredients that pair well with your overall dish; usually minced or chopped shallots/onion, minced or chopped garlic, stock, and herbs.
Tip: other great aromatic options would be mushrooms (when you want rich umami), and even ginger & lemongrass (for an Asian-inspired sauce)! - Sauté Aromatics.
Preheat a saucepan over medium heat for about 2 minutes. Add 1–2 tsp. of a heat-tolerant cooking fat (we love using clarified butter or ghee) and swirl it to cover the bottom of your pan. Sauté your shallots/onion until softened and fragrant, about 1–2 minutes. - Add garlic & liquid.
Add the garlic to your sautéd aromatics and stir until fragrant, about 30 seconds. Pour 1–2 cups of wine into the pan, being careful to avoid steam and potential splashing. Add the herbs.
Tip: garlic should only ever be added right before liquid, otherwise it will scorch and turn bitter. - Simmer and reduce.
Bring the mixture to a simmer, uncovered (this is key!), stirring occasionally, until the liquid reduces by at least half and resembles the consistency of a syrup. Depending on how much wine you used, this can take anywhere from 5–15 minutes.
🚨 Before that ~15 minutes passes, you usually have two ways of using your reduction: A) As a flavor-booster within a larger dish, like a stew—or in our case, baked chicken & rice.⏭️ For option A, move onto the next step of your recipe.
B) As the base of a wine reduction sauce sauce.
🥘 For option B, take the following steps to finish your pan sauce: - Continue making a pan sauce.
After the alcohol smell has dissipated from the wine, usually after 2 minutes of simmering, add stock (generally about 1/4 cup per 1 cup of wine). Continue simmering until the liquid reduces by at least half, anywhere from 5–15 minutes. - Monitor the consistency while simmering.
Your reduced pan sauce should coat the back of a spoon. If it’s too thin, continue simmering. If it’s too thick, add a splash stock (water works, but stock is ideal for flavor) to thin it out. - Finish the sauce.
Turn off the heat and add a few tablespoons of butter for richness and texture. This is also the time to season with salt & pepper to taste, and balance with an acid (lemon juice, white/red wine vinegar, or even mustard) to taste. - (Optional) Strain.
For an ultra-smooth and velvety sauce, strain out any solids like shallots or herbs using a fine-mesh sieve. If you’re looking for a more rustic texture, skip this step.
Now, you can either drizzle your pan sauce/reduction over your dish or serve it on the side for dipping.
Wine Reduction Pro Tip:
Avoid using “cooking wine”—it often contains added sweeteners, added sodium, and lacks any depth of flavor. Instead, always use a wine you’d happily drink.
What Internal Temperature to Cook Chicken Thighs?
For optimal texture and oh-yeah-juiciness, we recommend cooking dark meat chicken until its internal temperature is between 170° F (77° C) and 175° F (79° C), which is slightly higher than recommended by the FDA for food safety. We want our chicken juicy and tender, so we break down connective tissues more at that slightly higher temperature. 🤤
Variations on Classic Baked Chicken & Rice
While the classics are nothing short of comforting masterpieces on their own, we still have some room to play around and have fun!
- Mushroom & herb: build some extra umami by sautéing some mushrooms for about 5 minutes, then add the onions and continue sautéing.
- Mediterranean: sauté some sun-dried tomatoes along with the onions, include chopped green olives in the reduction, then garnish with a sprinkle of feta cheese.
- Spicy Thai: instead of yellow onion, start by sautéing chopped fresh or dried bird’s eye chilies (be careful, they pack a punch!), the whites from about 5 green/spring onions, and chopped ginger. Replace the thyme with Thai basil and swap at least 1 cup of stock for coconut milk.
- Moroccan: crank up the fancy by sautéing sun-dried tomatoes with the onion, then replace the thyme with a heavy pinch of saffron.
Is This Baked Chicken & Rice Recipe Gluten‑Free?
Yes! Our chicken & rice recipe is gluten-free; we don’t use any gluten-based thickeners (like flour) in this recipe. But as always, look for the “certified gluten-free” label on your ingredients. If you don’t see that on a specific ingredient you need, verify your ingredients do not have any gluten-based fillers or thickening agents, like “modified wheat starch” or “modified food starch.”
How to Make Elevated Chicken & Rice Safe for Pregnant People
Since the wine reduction step is one of the main reasons our baked chicken & rice is “elevated“, it’s understandable pregnant people may have some concern. However, cooking with alcohol is generally considered safe for pregnant people if it’s added early enough in the cooking process to evaporate almost all of the alcohol, and the food is thoroughly cooked through, which is the case for our recipe.
However, if you are trying to completely avoid foods that contain any trace amounts of alcohol, it’s perfectly fine to omit wine from the reduction step and use an equivalent amount of chicken stock, instead. Your dish won’t have the same depth but we guarantee it will still be (somewhat) elevated if you follow the remaining steps.
Elevated Baked Chicken & Rice Tips for Success:
- Prevent soggy rice by using the correct rice-to-liquid ratio and avoid over-stirring during cooking. This is why we don’t add all of our stock at once.
- Ensure crispy chicken skin by patting the chicken as dry as you can get it, and resting it after salting (known as a dry brine).
- Get an even sear on the chicken skin by slowly preheating your cast iron pan. Cast iron is great for heat control but if you heat it too quickly, it will build hot spots.
Why You’ll Love Our Elevated Baked Chicken & Rice Recipe
With a balance of tender chicken, perfectly seasoned rice, and a pop of vibrant herbs, this recipe brings restaurant-level elegance to your dinner table without requiring hours in the kitchen.

 By Jen Gadus | Published January 18, 2025
Easy


